Link Cause Machine and Zapier
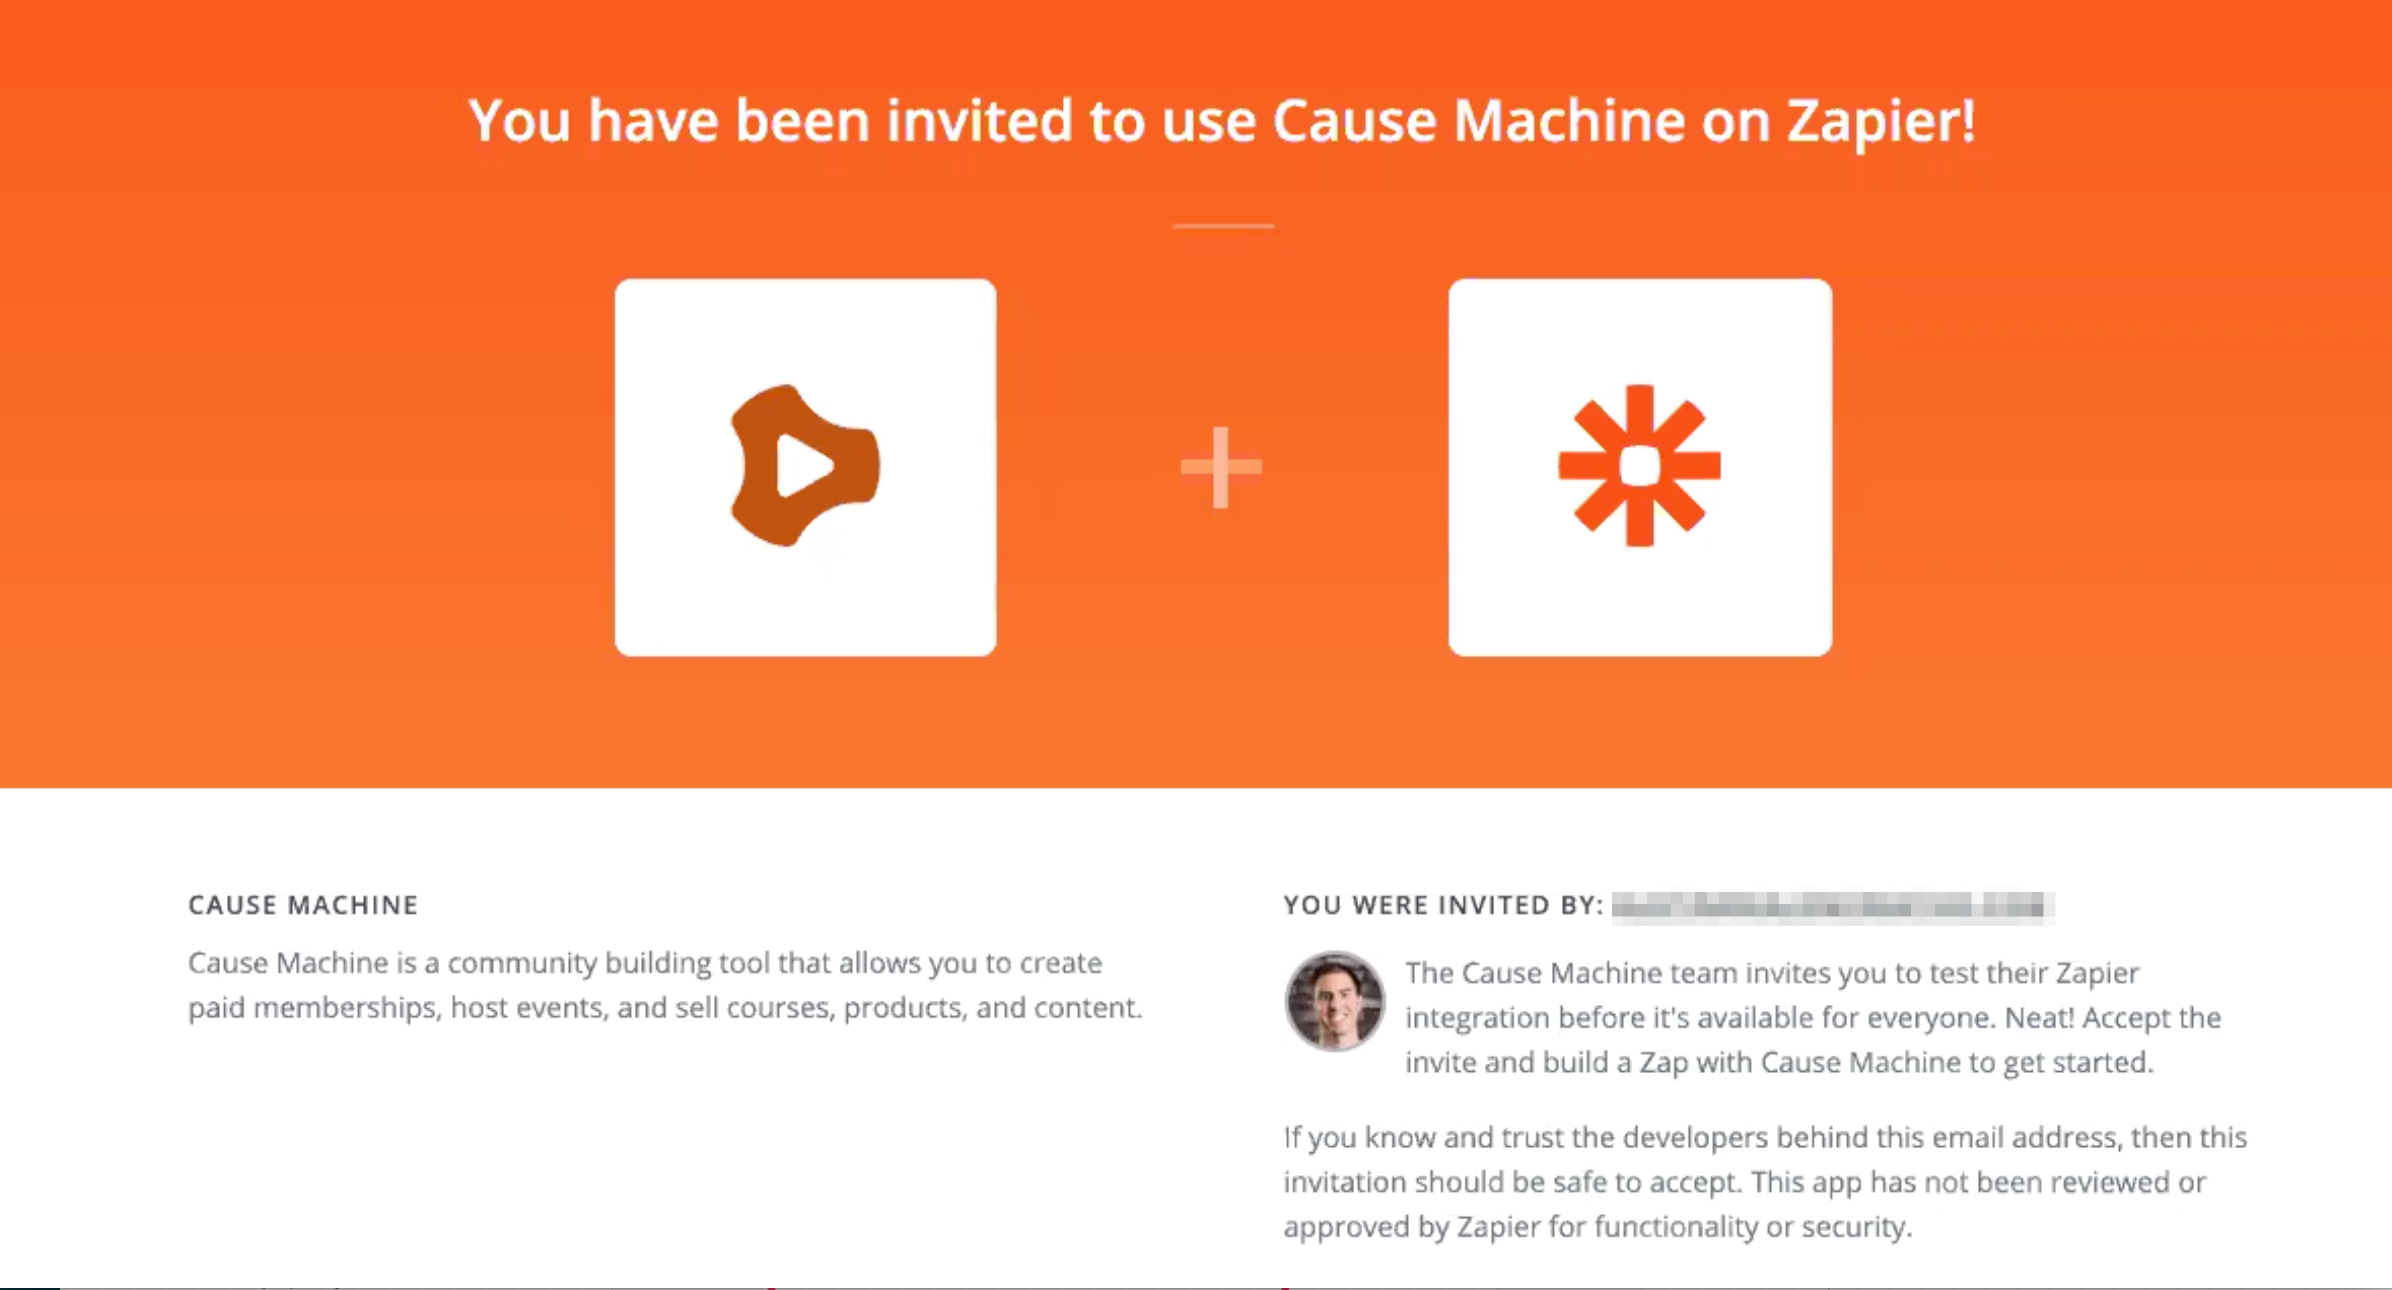
To get started, first create your own personal Zapier account and then click the link below to add Cause Machine to your organization's Zapier account.
Access Cause Machine in Zapier
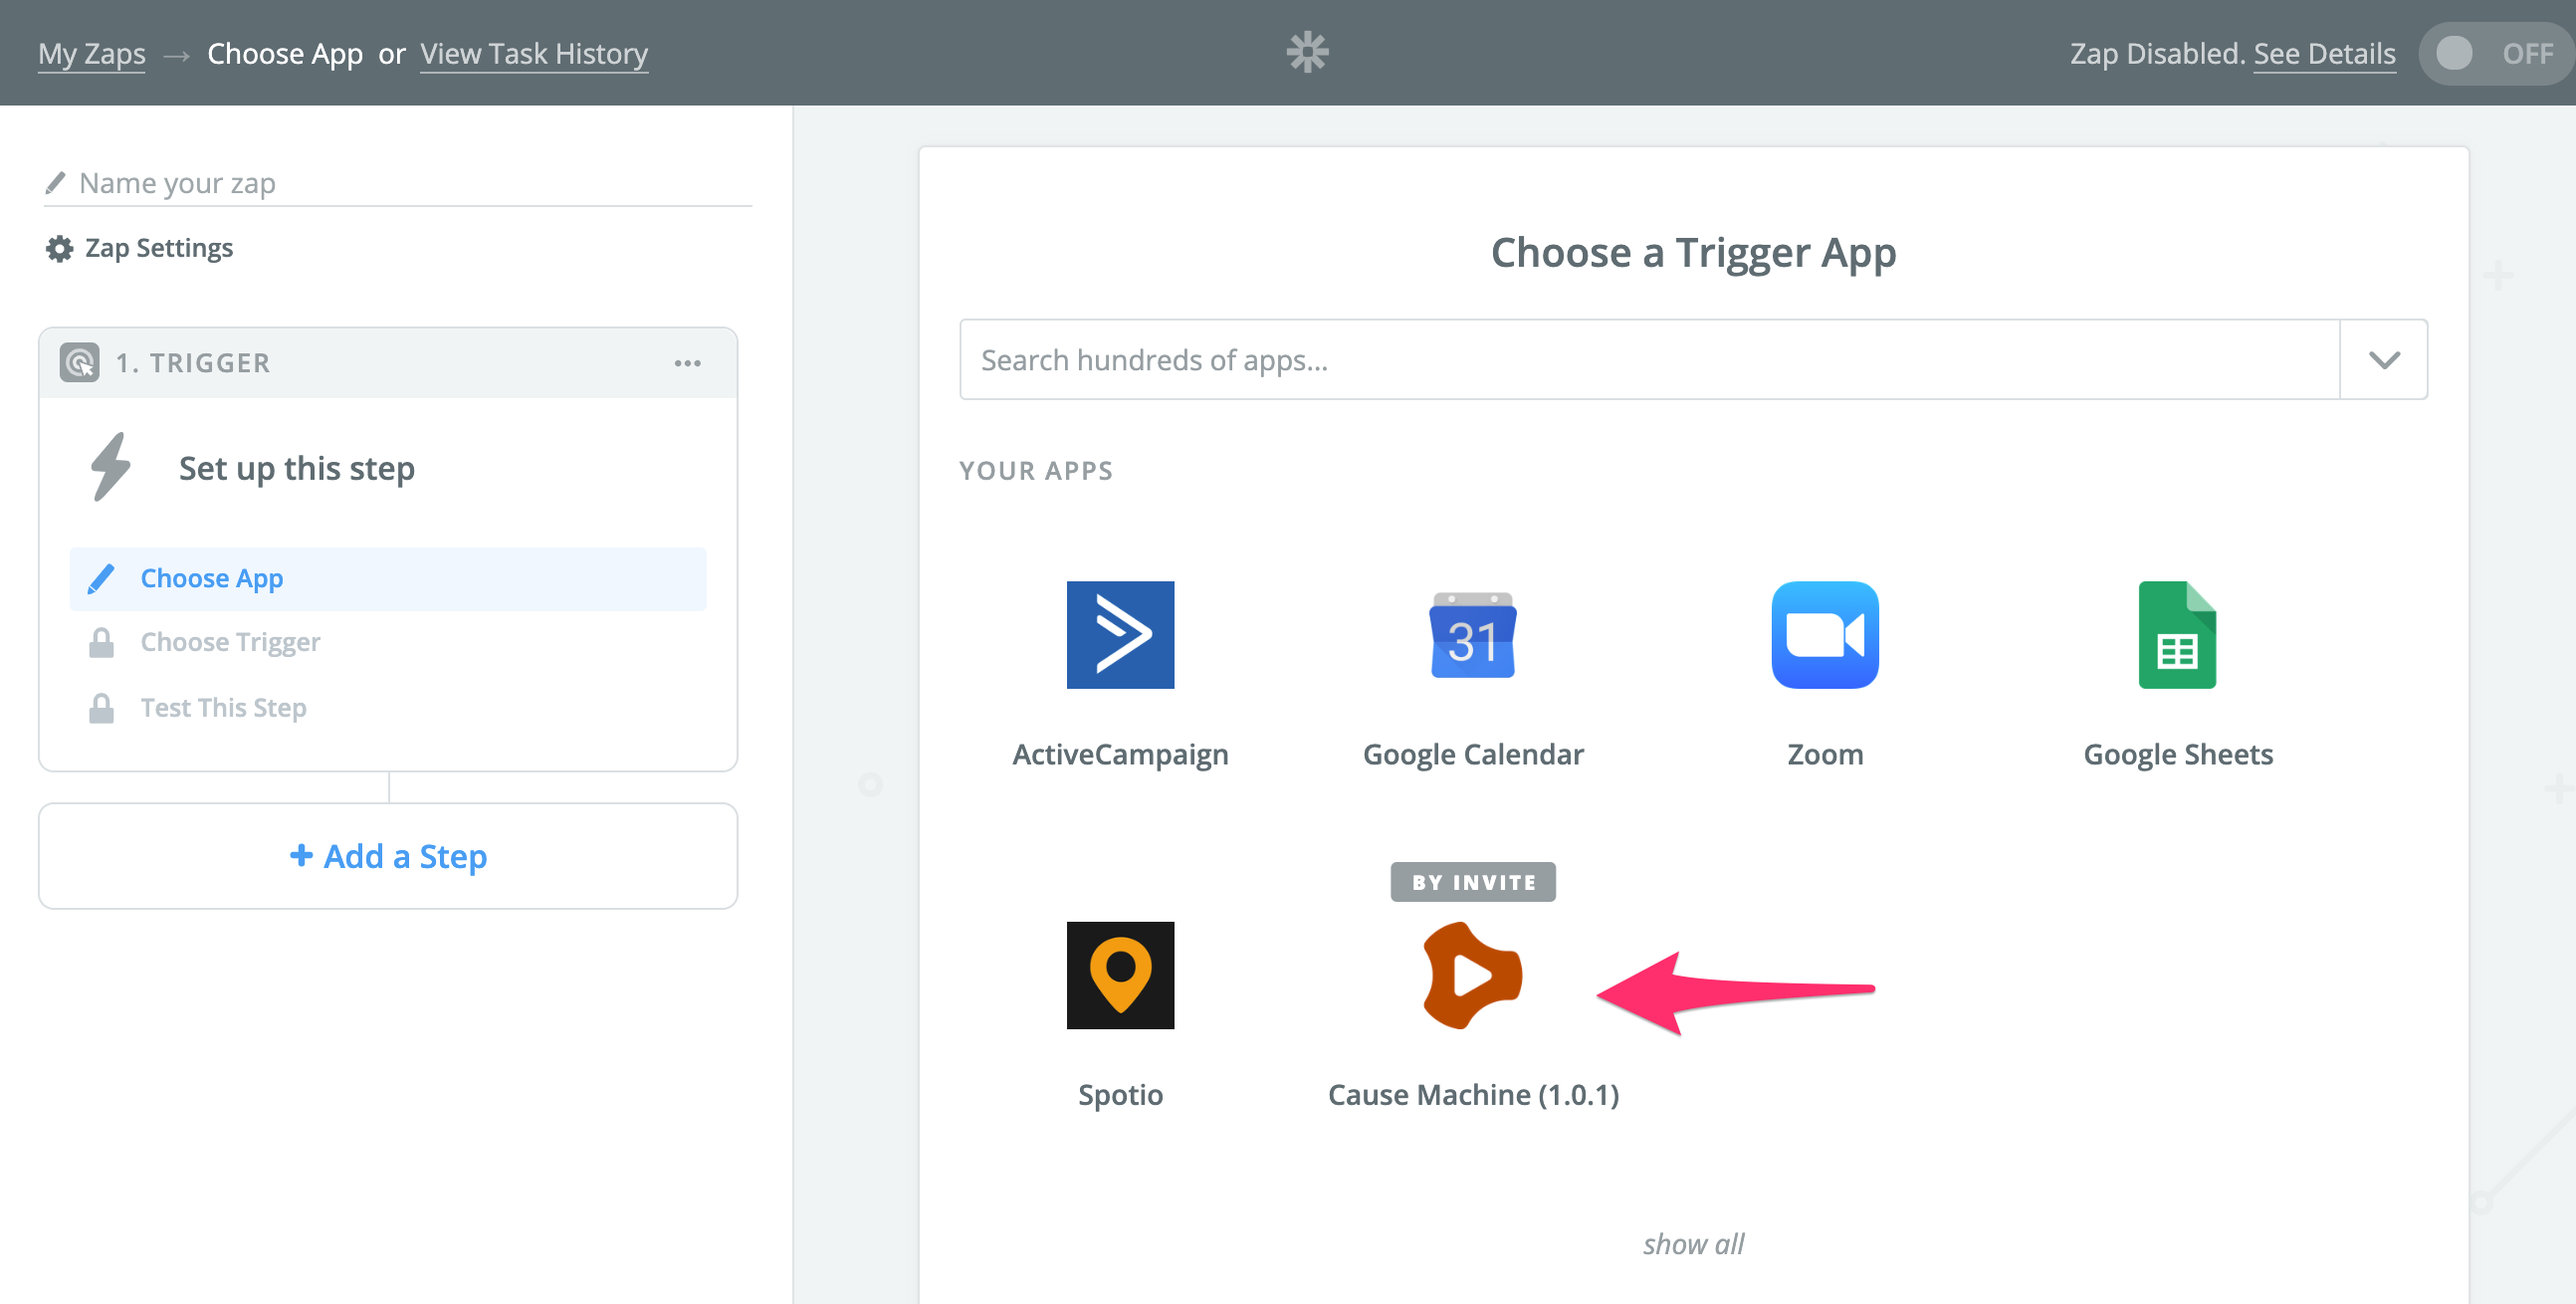
Create a New Zap
Once you have accepted the public invite for Cause Machine in Zapier, you can create a new Zap and choose Cause Machine for your first Trigger App.
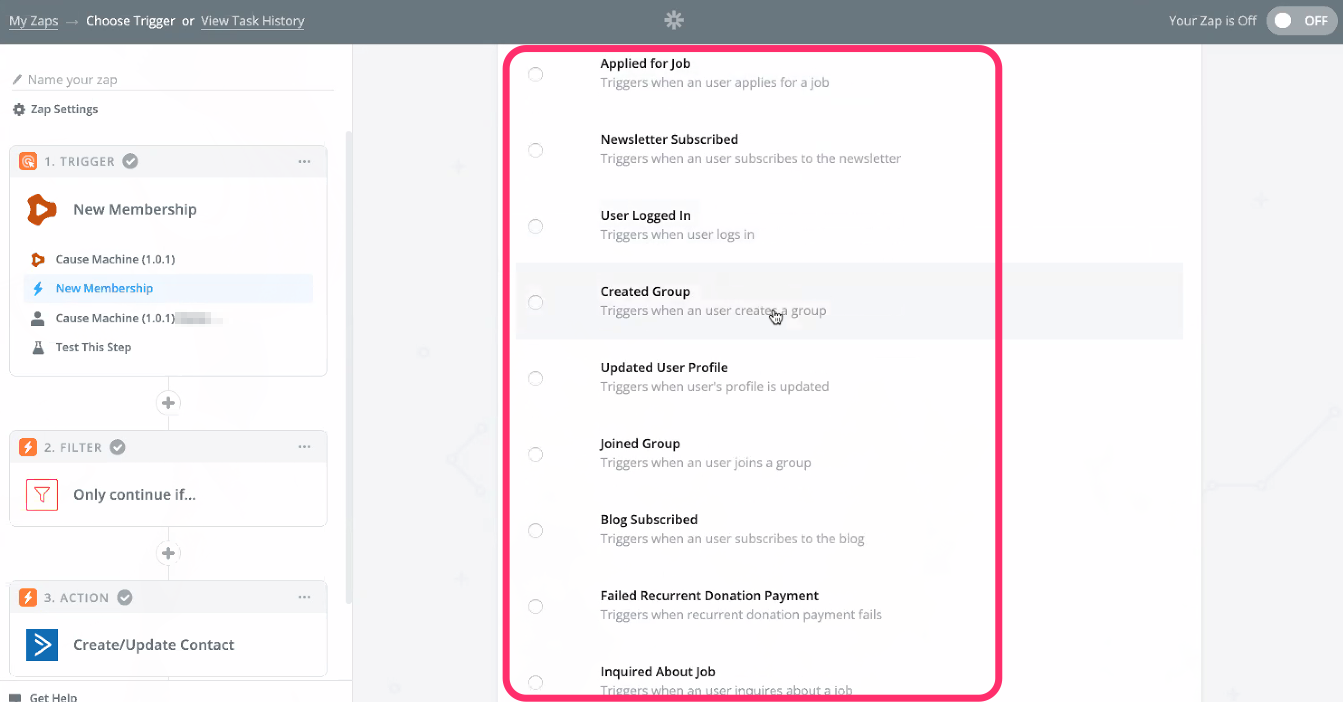
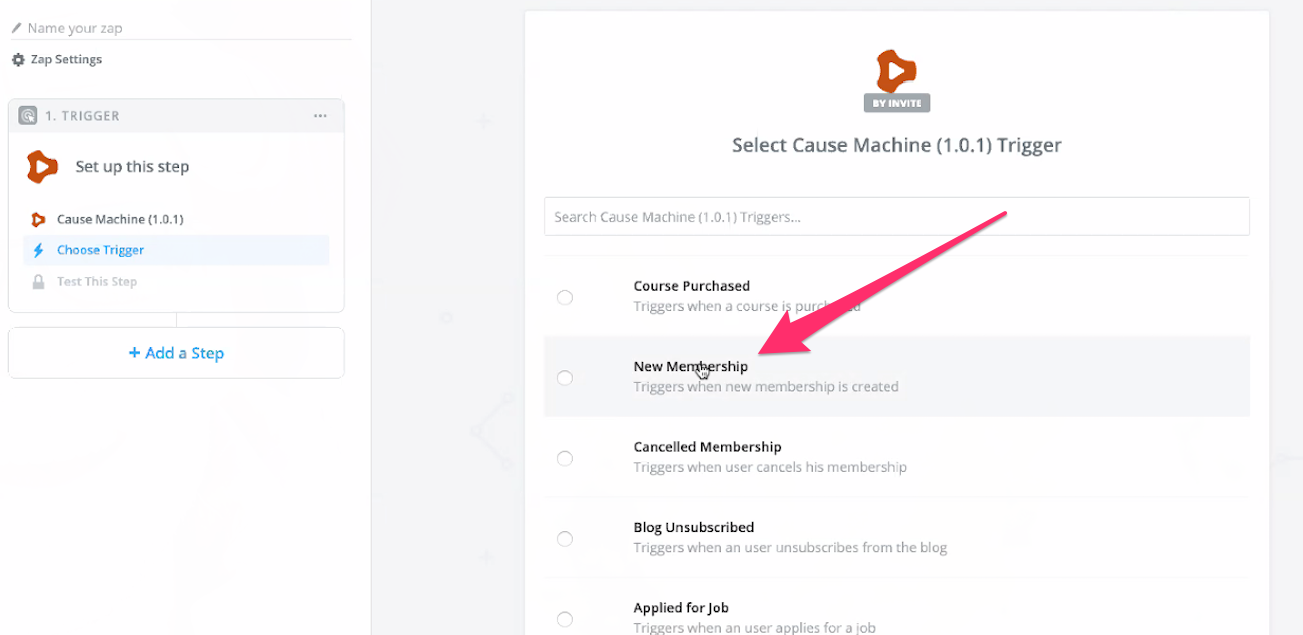
Select a Trigger
Next you will see the directory of Cause Machine triggers. Cause Machine has over 30 triggers of member activity within the platform. Each of these can be used to activate some action in another platform.
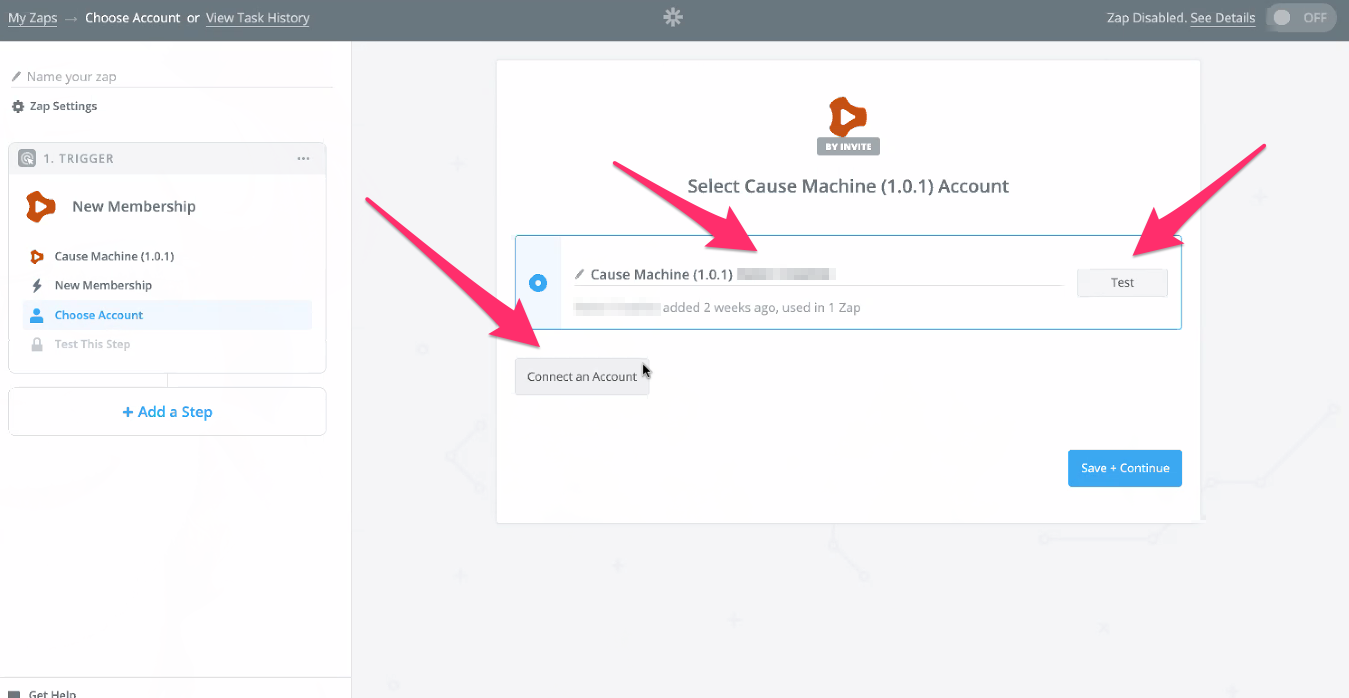
Next you will authorize your Cause Machine account (if you haven't done so already in Zapier). Zapier will open a window where you will be prompted to sign into your Cause Machine account (if you already already signed in) and grant Zapier access to your Cause Machine account.
Membership is a good place to start for creating a Zapier connection in this example. Select New Membership to create a zap with this trigger.
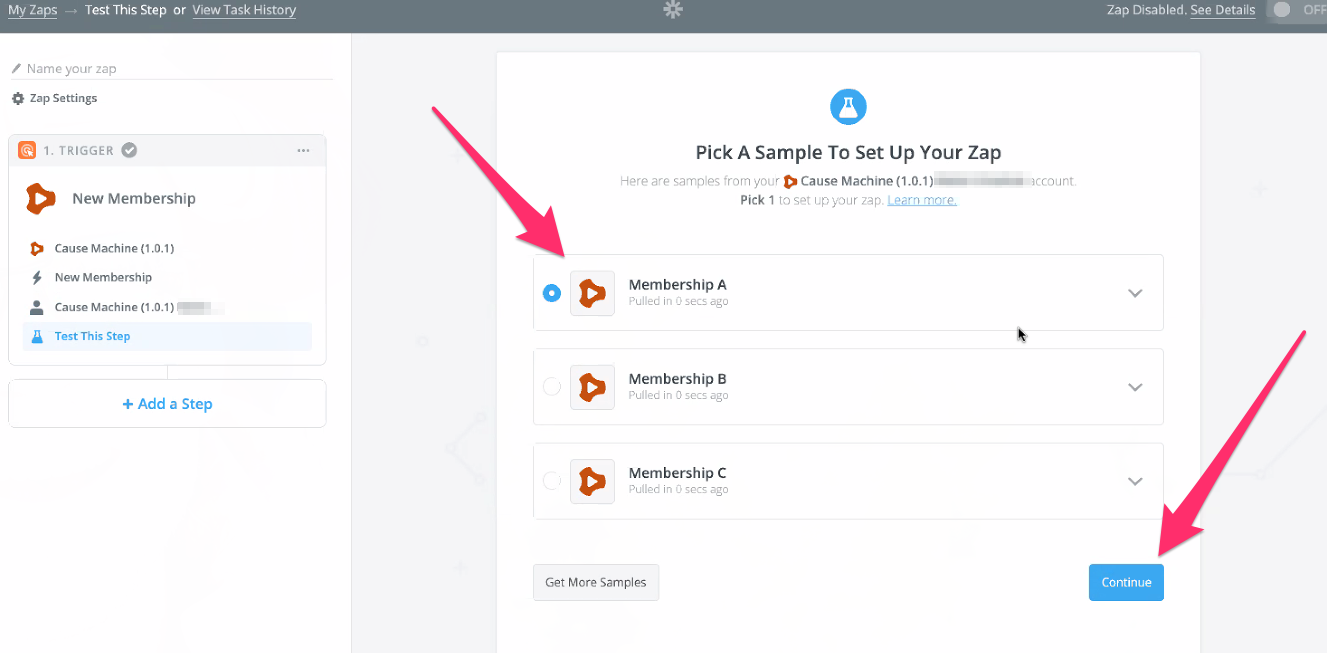
Next Zapier will pull a list of recent memberships. Select one to use as an example through the setup process.
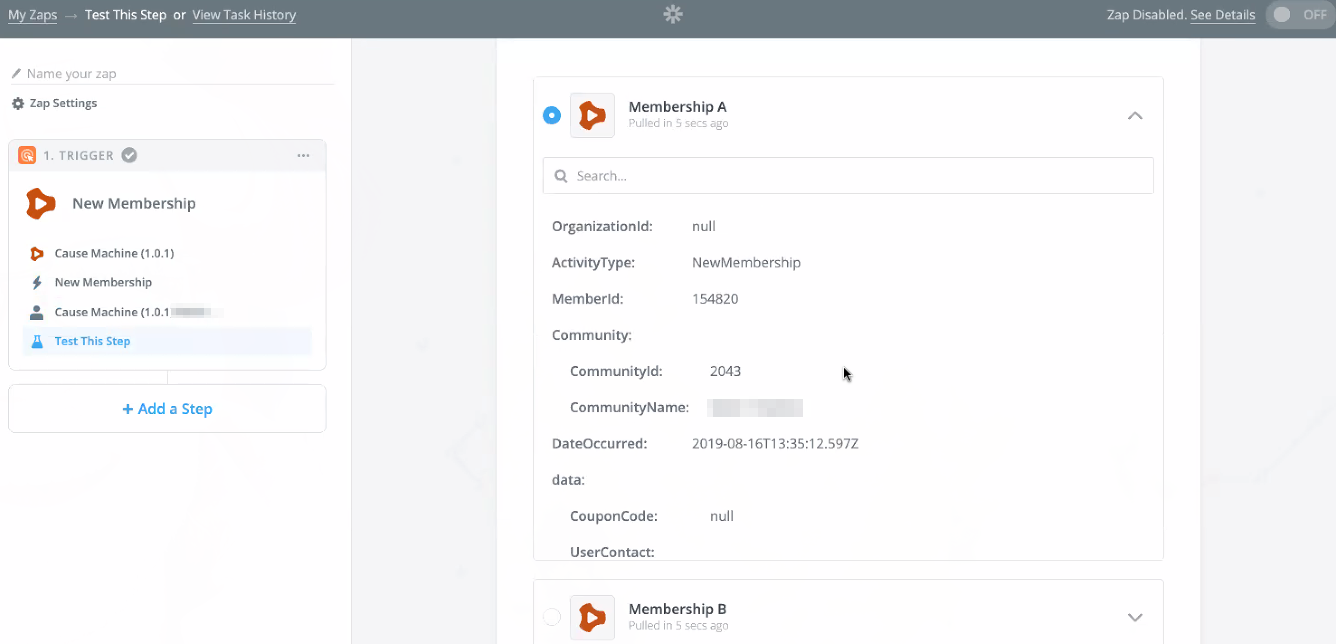
This will then display all the information that will be pulled from Cause Machine to another system via Zapier.
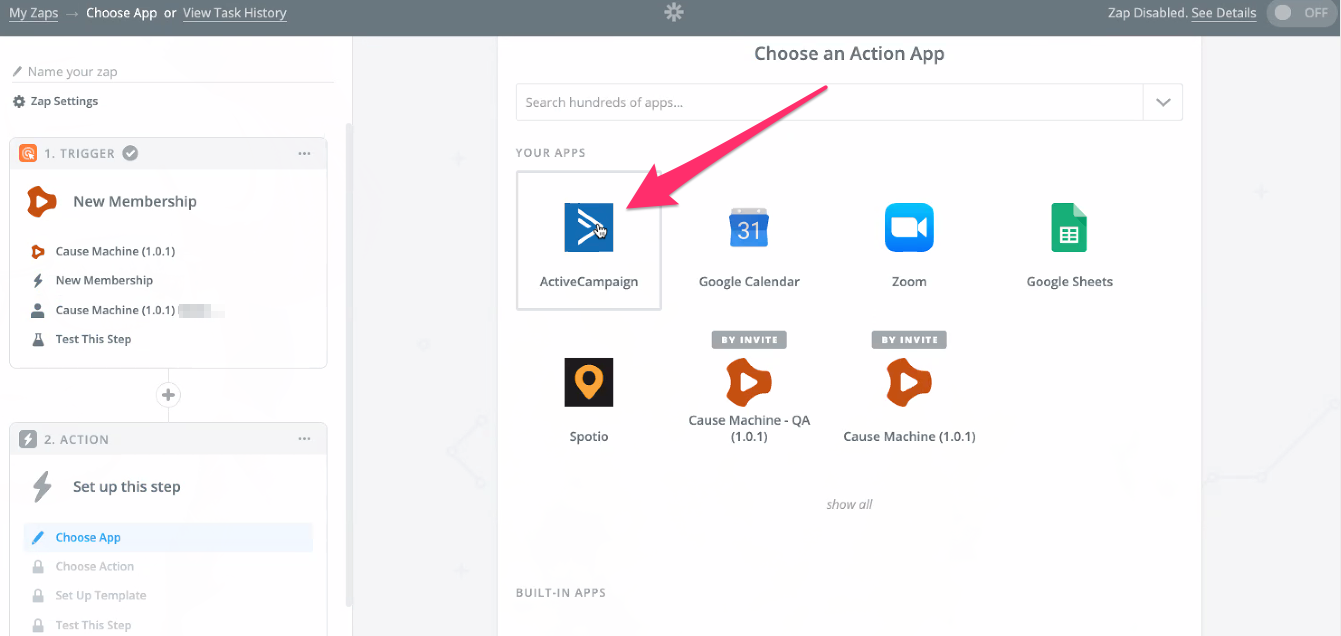
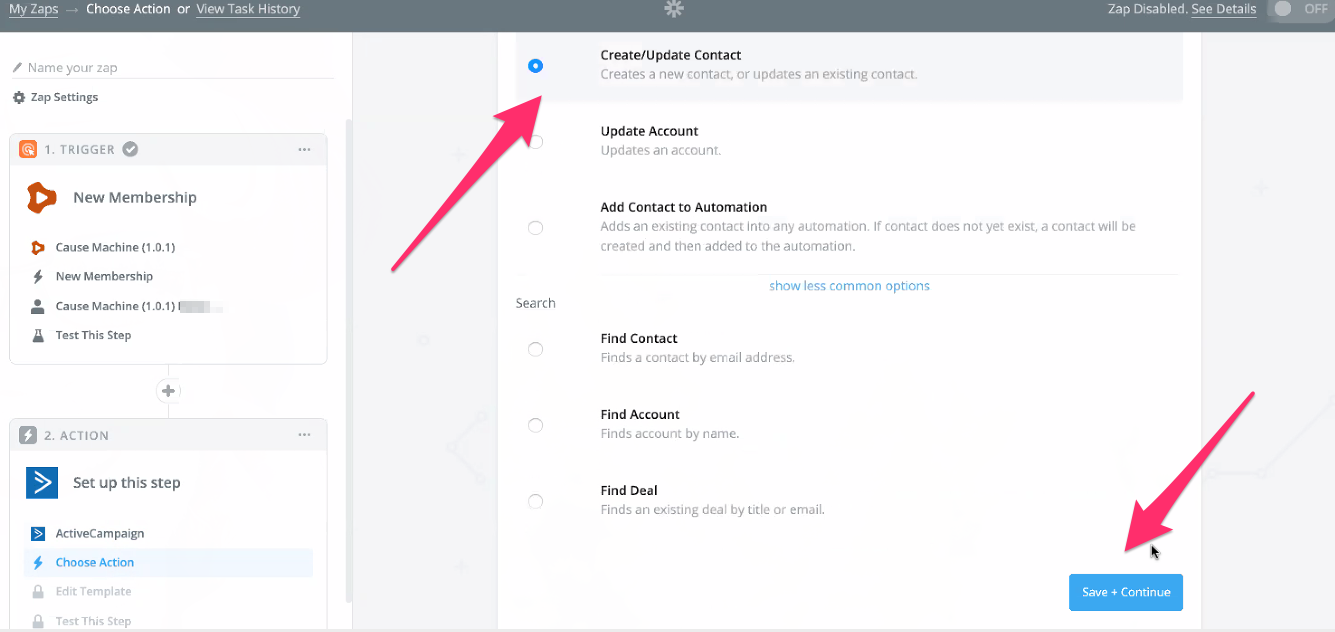
Choose an Action
Once you have selected the Cause Machine Trigger then you'll select which other platform you want to be sending these data points to next. In this example we are transferring data from Cause Machine to Active Campaign.
In this example, we want to update a contact in Active Campaign - this is the action we will take with this information.
Next you wire up (connect) the specific pieces of information from Cause Machine to the system (Active Campaign in this case). Some fields will allow you to select an option from your account in Active Campaign -- like the list you want to add the contact to.
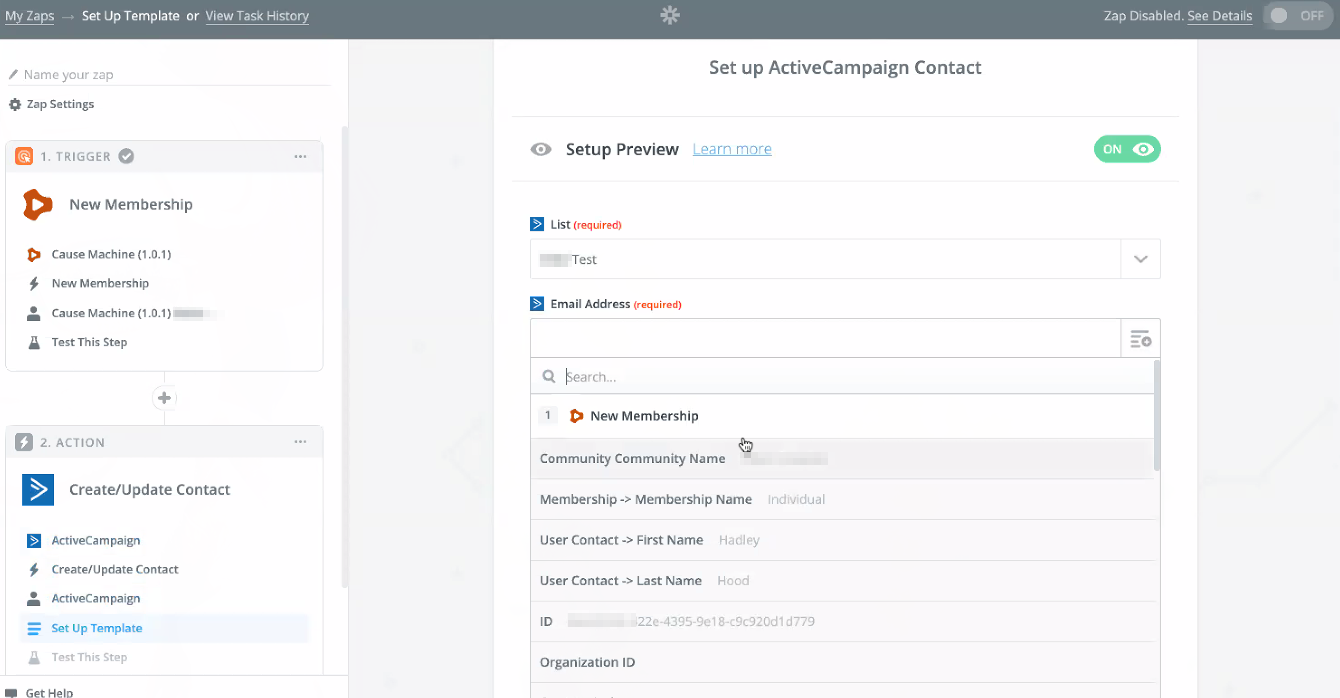
Other fields you will populate with data from Cause Machine. Click the icon to the right of the field to search for data from your trigger in Cause Machine. Once a field has been assigned you will see the green notation for a field having been connected between your two accounts.
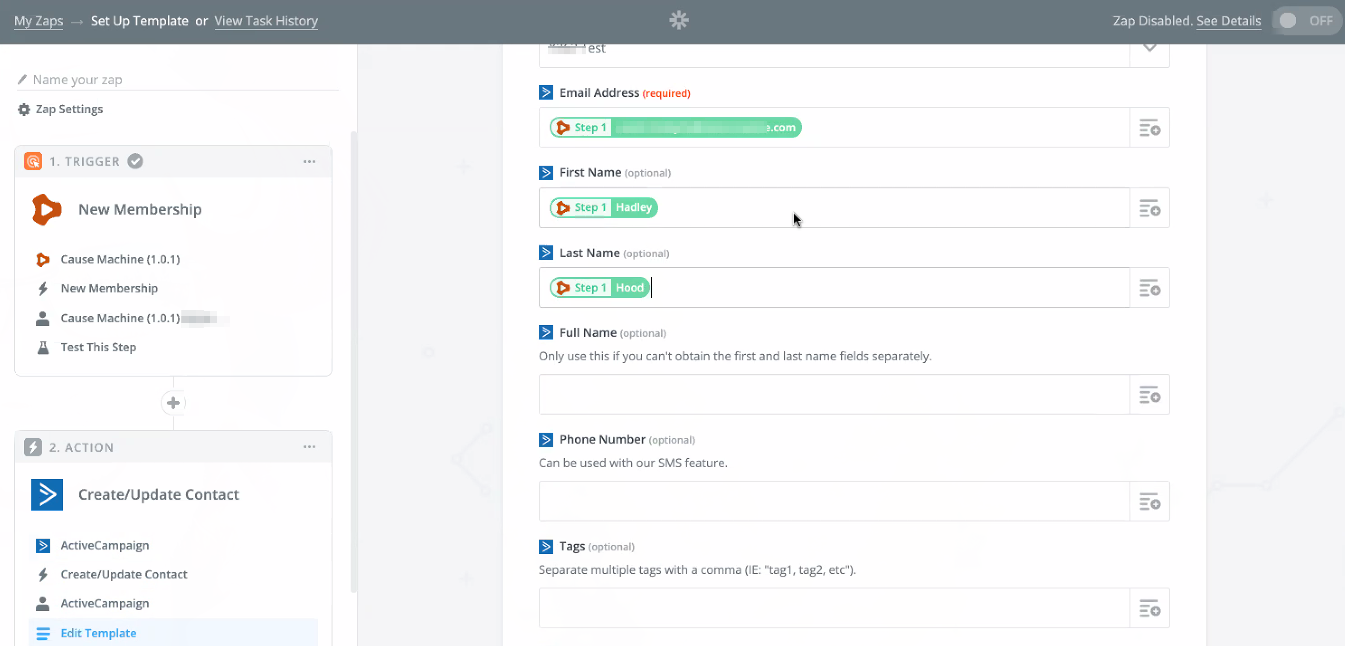
Here's an interesting example of what you can do. You can tag individuals within Active Campaign so you could tag them with their membership type and then also create a custom tag for something like "Cause Machine" to know where this person came from.

Next Zapier will let you test each of the connections and displays a success message.

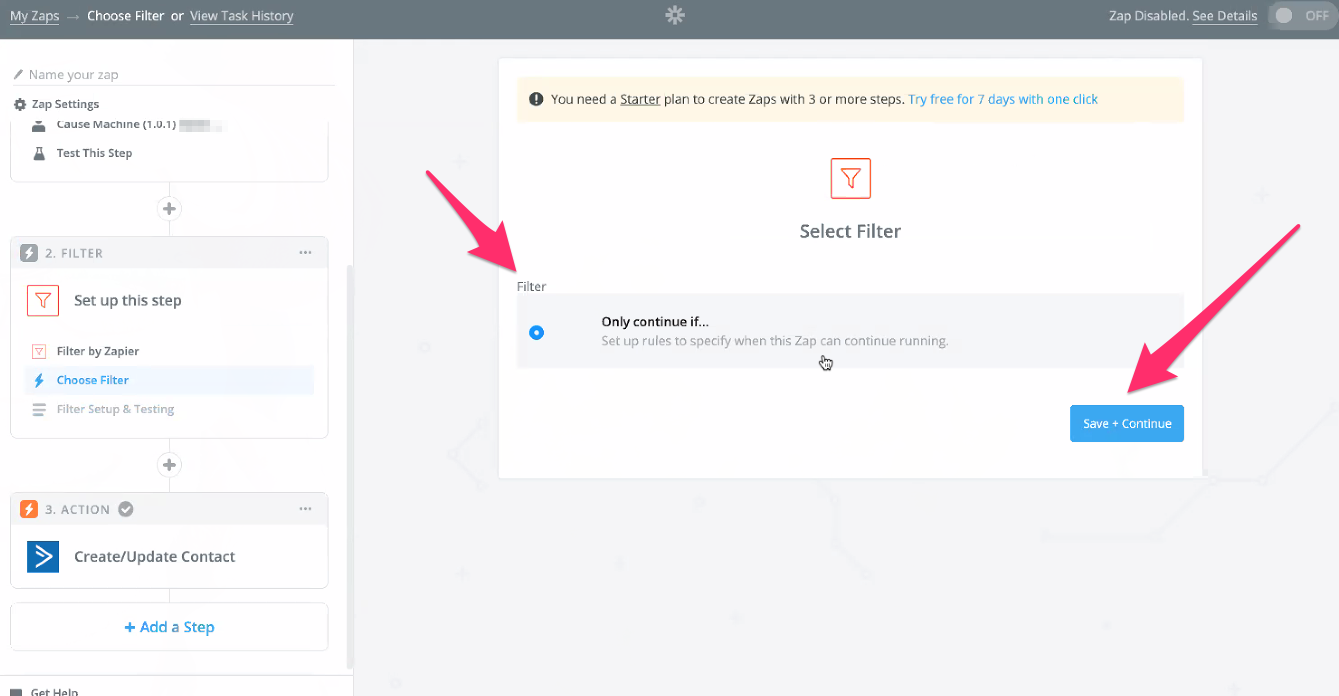
Filters
Zapier allows for multi-step actions. For example, if you want to create a different flow for each of your membership accounts. The Filter step creates a logic of "only continue if...". You can then compare the Membership Type (or any other field from the Trigger) to determine if this Zap should continue.
Save Your Zap
Finally, give your zap a name and turn it on to start having Zapier perform your automated action any time a new event is triggered in Cause Machine.

Was this article helpful?
That’s Great!
Thank you for your feedback
Sorry! We couldn't be helpful
Thank you for your feedback
Feedback sent
We appreciate your effort and will try to fix the article